Cabinet Painting Sacramento is a budget-friendly alternative to full refinishing or replacement. With full design flexibility and a quicker turnaround, it offers superior ROI compared to refacing.
Color matching is crucial to a seamless touch-up. The wrong shade can make repairs stand out instead of blending in. Sheen matters, too.
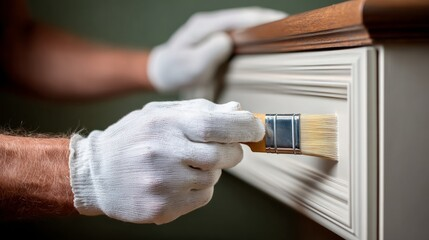
Preparation
Painting cabinetry provides homeowners with a cost-effective solution for updating their kitchen or bathroom. However, it’s important to understand the pitfalls of this DIY project before attempting it yourself. Achieving a professional-looking finish that lasts requires careful surface preparation. According to Mauro Herique, an expert in painting techniques, more than 85% of a successful cabinet paint job is spent on preparation. Thorough cleaning and sanding remove accumulated grease, grime and previous layers of paint while smoothing the surfaces for paint adhesion. Skipping these crucial steps can lead to poor coverage, unsightly or uneven finishes, and a cabinet paint job that deteriorates quickly.
Choosing the Right Surface Prep Products
To achieve a smooth finish that stands up to moisture, heat, grease and everyday wear and tear, it’s critical to use products formulated specifically for cabinets. Latex wall primers, for instance, aren’t designed to bond effectively with cabinet surfaces and won’t hold up in a damp or humid environment. To avoid costly mistakes, it’s best to work with a professional who has experience in cabinet painting.
Proper surface preparation can be a time-consuming and labor-intensive process. Depending on the size of the cabinets and level of damage, removing doors and drawers, cleaning the surfaces and degreasing them may take several hours or days. To make the job easier, it’s helpful to plan ahead and organize tools and materials. As you work, be sure to protect surrounding areas with drop cloths and painters tape.
It’s also essential to carefully clean and sand surfaces before priming. This helps ensure a clean and even base coat, which in turn promotes superior topcoat coverage and adhesion. Sherwin-Williams recommends a thorough cleaning with a degreasing cleaner, followed by sanding with progressively finer grits to create a smooth base.
After sanding, it’s a good idea to apply a coat of Sherwin-Williams Extreme Bond Primer in an inconspicuous area to ensure quality adhesion and a smooth result. Then, once the primer dries completely, you can begin the cabinet painting process. If the results are satisfactory, you’ll have a great-looking, long-lasting kitchen cabinet transformation that will give your home a fresh new look.
Primer
A primer is like the glue layer that connects your paint to the cabinet surface. It is a special formula designed to adhere really well, which makes it much easier for your top coat of paint to stick to the cabinet. It also provides a slightly rougher base, which is more compatible with the sheen you choose for your finish.
You need a good primer to avoid flaking, peeling, and other surface issues, especially since cabinets are constantly opening and closing, getting hit with moisture and spills, and otherwise seeing heavy use. A good primer will also help your finish hold up better over time, meaning that touch-ups will be less necessary.
When it comes to choosing a primer, there are many different options available, depending on what type of surface you’re working with and the desired outcome for your project. There are adhesion primers, stain blocking primers, and even oil-based primers that are great for projects involving nicotine stains or smoke damage. Adhesion primers work well for slick surfaces, like laminate, and create a strong bond to ensure that your top coat doesn’t peel or chip. Stain-blocking primers are excellent at hiding stains and preventing them from bleeding through the new paint. These are particularly effective on raw wood, such as oak.
Oil-based primers can require extra prep steps, such as sanding, but they provide superior adhesion and durability. However, they can take longer to dry and cure, which may not be ideal for a busy kitchen. There are water-based primers that are a good alternative, and these tend to be much faster drying. Zinnser BIN shellac primer is a great choice for a fast-drying, high-adhesion primer that is also easy to sand for smooth, professional results.
No matter which type of primer you choose, it’s important to follow the directions on the label and allow plenty of time for it to fully dry and cure before putting your cabinets back into use. It may take weeks or even months for some finishes, like enamel, to fully harden up. This isn’t to say you can’t use them sooner, but it’s best to give them the time they need to get nice and tough!
Paint
Most how-to’s for cabinet painting focus on using a smooth roller or high-quality brush to get the best result. This works well for other trim parts of your home, such as baseboards or window sills, but it can be difficult to get a consistent, smooth result on cabinets that are curved, molded, or have details like raised panels. A professional painter will use a special wide brush designed for cabinetry to get a good flow of paint, minimize drips, and avoid brush marks. They also know how to mix in leveling additives when necessary to achieve a really smooth result.
When painting cabinets, it’s important to choose a paint that will stand up to wear and tear. Most cabinet paint is a hybrid alkyd-urethane blend that’s specifically designed to resist chipping and peeling. This type of finish dries to a tough, durable surface that can be wiped down easily to remove grease or fingerprints.
You’ll also want to choose the sheen you prefer. Matte finishes are less shiny and hide fingerprints better, while glossy sheens are more resistant to moisture and stains.
If your cabinets are made of unfinished or raw wood, you’ll need to use a primer that blocks wood tannins before applying your first coat of cabinet paint. You’ll also need to carefully sand all surfaces before painting, making sure to get into the corners and detailed areas on doors and drawer fronts.
Another thing to keep in mind is the cost difference between refacing and painting. Refacing typically costs 30-50% less than replacing cabinets, but it’s still a significant expense.
Painting can be a great option if you love your kitchen’s layout and are satisfied with the functionality of your cabinets, but you want a fresh new look. However, it’s important to consider the time and labor involved in proper preparation, sanding, priming, and multiple coats of cabinet paint. In addition, painted cabinets may show more wear than refacing, requiring frequent touch-ups or full repainting over time.
Finish
Cabinet painting is a cost-effective way to update your kitchen or bathroom cabinets. A professional cabinet painter can refresh your cabinets with a new coat of paint, resulting in a dramatic transformation for a fraction of the price of replacing or refacing them.
To start, cabinet surfaces are cleaned and lightly sanded to prepare them for painting. Then, a primer specially formulated for cabinet surfaces is applied to seal surfaces, block stains and improve paint adhesion. After priming, a high-quality latex cabinet paint is brushed on in a color of your choice. Multiple coats of paint may be needed for full coverage and a durable finish. Finally, cabinet hardware is replaced and the cabinets are reinstalled to complete the transformation.
While cabinet painting is a budget-friendly option, it doesn’t address major problems or structural issues with your cabinets. It’s also more prone to wear and tear than refacing, so you may need to touch-up or repaint cabinets more often than with other options.
Another drawback of cabinet painting is that it can mask or cover natural wood grain and texture, which some homeowners prefer to showcase. Lastly, the process can be messy and labor-intensive. However, with the right tools and techniques, your kitchen cabinet painters can minimize mess and disruption to your daily routine.
While refacing is typically more expensive than painting, it’s a good option for homeowners who are looking to upgrade their cabinets with a minimal investment and maximum durability. Cabinet refacing replaces the cabinet doors and drawer fronts while leaving the cabinet boxes in place. They then cover them with a matching veneer, giving your kitchen a brand-new look for 30-50% less than cabinet replacement.